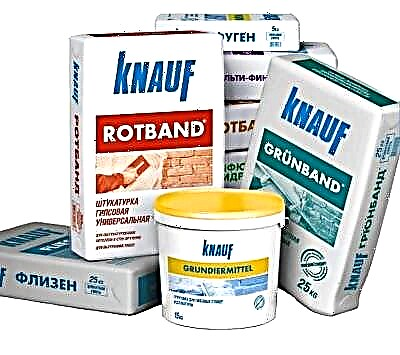
Gypsum is made from calcined gypsum stone, crushed to a powder state. It is an environmentally friendly natural material. Gypsum plaster can lay down in a thick layer, so it perfectly hides obvious surface defects.
Gypsum itself hardens very quickly, so for the convenience of work, the plaster contains various additives. It:
- fine-grained fillers that facilitate the weight of the building mixture, for example, polystyrene foam, foam glass or perlite,
- plasticizers that increase elasticity,
- lime or whitening additives,
- retarders.


Fillers also increase thermal insulation properties, enhance adhesion. Gypsum plaster fits perfectly on brickwork, concrete walls, glossy surfaces, cellular foam concrete, expanded clay concrete and aerated concrete. If the old layer of gypsum plaster is strong enough, but you can apply a new one on top.
Thanks to additives, which make up no more than 10%, the plaster is easy to apply, plastic and has a lower weight. This facilitates repair work and reduces their time.
This mixture is used for leveling before finishing horizontal and vertical surfaces, walls and ceilings in rooms with normal humidity.You can use it to close cracks, pits, cracks. Due to its environmental friendliness, the mixture is suitable for residential premises, but is used only for interior decoration.
Features
Gypsum plaster is a modern finishing material, which is used for applying both rough and finish coatings. In general, gypsum-based mixtures are recommended for interior decoration with low air humidity. But new technological additives and some additions to the process technology allow the use of gypsum plasters in the bathroom, toilet or for outdoor work
Such modifiers are bulk fillers with various sizes of fractions and polymer or mineral additives. They make the solution easier and more flexible, and also improve its adhesion to various surfaces. The gypsum component regulates the microclimate of the room by absorbing moisture from cold air and its subsequent return with increasing temperature in the room.
Gypsum plasters are suitable for the correction of small and large surface defects, while they are easy to use.
Specifications
Gypsum plasters in their technical characteristics are very different from cement and lime stucco mixtures. The features of these parameters mainly depend on the basic component, which is a mineral of natural origin - gypsum. The differences between the properties of the solution and the finished coating are due to technological additives present in the mixture.
Regardless of the manufacturer and the characteristics of the ingredients, the following characteristics are inherent in the finished gypsum coating:
- Environmental friendliness. The surface of the material does not emit substances harmful to health, even when heated and wet.
- Thermal insulation. The thermal conductivity of gypsum plaster at a density of 800 kg per m3 is in the range 0.23-0.3 W / (m ° C).
- Soundproofing. Plaster refers to soft materials and absorbs noise coming from outside.
- Vapor permeability. Natural ventilation and a comfortable microclimate in the room are achieved through the absorption and release of moisture by the material, depending on temperature and humidity.
- Frost resistance.The frozen surface withstands temperatures from -50 to + 70 ° C.
- Hydrophilicity. Gypsum absorbs water very well. With excessive wetting, the material acquires the structure of the test.
During the work, it is necessary to observe the air temperature from +5 to + 30 ° С. The room should be well ventilated, but drafts should be avoided. Direct sunlight on a dry layer of plaster can cause cracks.
The consumption of material for plastering 1 m2 of the surface with a layer of 1 cm ranges from 8 to 10 kg. In one run, you can apply a layer of mortar up to 5-6 cm without reinforcement, with the installation of a reinforcing mesh up to 8 cm is applied.
Curing of the composition usually occurs 1 hour after application, the surface dries out after 3 hours, and it can take from 7 to 14 days to set strength.
Manufacturers offer gypsum plaster in the form of dry powder and ready-mix. The supply of dry material for the preparation of the solution to the points of sale is carried out in paper bags, the bulk weight of which can be 5, 15, 20, 25 and 30 kg. To prepare the mixture, 2 parts of such plaster are mixed using 1 part of water. The finished material is supplied in the form of a plastic paste in buckets of 20 liters.
Composition
The main component of gypsum plaster is aqueous sodium sulfate, which is commonly called gypsum or alabaster. Stones from this mineral of natural origin are subjected to prolonged firing at high temperatures, and then crushed to the desired fraction size. The smaller the size of the resulting particles, the better the quality characteristics of the finished raw material. The gypsum component is responsible for the astringent properties of the mixture.

Additional ingredients in the form of fillers of natural or artificial origin give the gypsum-based plaster the required properties. They make the mixture lighter, reduce material consumption and increase strength characteristics. Also, the size and shape of the filler particles give the surface a different texture. Such components may be frayed sand, polystyrene foam, foam glass, vermiculite and perlite.
The thickness of the applied layer also depends on the size of their grains:
- fine-grained are applied with a thin layer of 8 mm,
- medium-grained: coating thickness up to 5 cm,
- coarse grains are used for the device of a thick layer.
For bleaching the plaster mixture, the composition includes titanium or zinc white, which are metal salts. In addition to bleaching, calcareous fillers change some features of the solution. The setting of the lime-gypsum plaster takes place after 5 minutes, after 30 minutes the surface hardens, and the strength is gained after 1-2 days.
Polymer and mineral additives are used as plasticizers and regulators of the setting time and hardening of the mixture. These components give the composition additional plasticity and improve adhesion to the machined surfaces. The exact composition and production technology of such elements are not disclosed to the consumer for commercial reasons.

Dry plaster is diluted only with water, without adding any additional ingredients. Depending on the desired consistency of the solution, the amount of water can be adjusted. The liquid mixture is suitable for finishing a flat surface or decoration. In this form, it is easily distributed on the wall.
A thick solution is used for rough leveling, sealing cracks, chips and potholes.
Advantages and disadvantages of gypsum cladding
The basis for this type of composition is gypsum. It is obtained from a natural mineral, which is crushed after a long heat treatment. The quality of the processed surface depends on the degree of its grinding. The larger the fraction, the greater the irregularities it can close. In addition, the material contains natural and synthetic fillers. They improve ductility, increase adhesion, etc.
The general advantages of gypsum solutions are:
- Plastic. Easy to apply, smooth and smooth. It does not crack after drying.
- Good leveling ability. After applying the mixture, the surface is ready for the finish.
- Ability to apply a thick layer up to 60 mm.
- Low consumption rate, subject to accurate application technology.
- High curing speed. On average, a full set of strength in a mixture takes no more than a week. Finishing work can continue in a day.
- Good adhesion to any surface.
- Vapor permeability. The surface does not lose the ability to "breathe".
- Light weight. Additional reinforcement of walls or partitions is not required.
Of the significant shortcomings of the mixtures, you need to remember about low strength. A strong blow can cause damage to the coating. Plaster is afraid of moisture. It absorbs water and collapses, so it can not be used in rooms with constantly high humidity or on the street. Due to the high drying rate, the solution quickly hardens, for this reason it is prepared in small batches. The cost of such cladding is quite high.
Properties and scope of gypsum plaster
Gypsum plaster can be applied to: concrete, foam concrete, brickwork, gypsum walls and ceilings, cement and sand substrates, as well as other surfaces that are not prone to deformation under the action of moisture.
Gypsum compositions have many positive qualities:
- They allow you to get a very even and smooth surface, which is especially important if the walls will subsequently be painted or glued with thin wallpaper.
- Gypsum plasters have an economical consumption, and working with them is simple, quick and convenient.
- Due to the low thermal conductivity, such a material acts as an additional wall insulation.
- Gypsum is able to absorb excess moisture from the air and give it away when the room becomes too dry. Due to this property, gypsum-based plaster constantly maintains an optimal microclimate in the room.
- All components that make up the material are hygienic and environmentally friendly, do not cause allergic reactions, do not have an unpleasant odor.
- The fire safety of gypsum is another indisputable advantage.
- You can safely drive in nails or screw dowels into the surface finished with gypsum composition.
There are not so many shortcomings in gypsum mixtures, good hygroscopicity can be considered the main disadvantage. This quality does not allow the use of plaster for the decoration of building facades or rooms with a constantly high level of humidity. However, the scope of such material is quite wide. Plaster on gypsum-based finish walls, partitions and ceilings in bedrooms, kitchens, halls, hallways and other rooms of residential buildings. This material can also be found in commercial buildings: offices, shops, shopping centers, banks, hairdressers, etc.
Basically, gypsum plasters are used for internal works, but recently mixtures for external ones have also begun to be produced. The latter contain additional mineral and polymer additives that protect the facade from precipitation.
For interior decoration, gypsum plaster mixtures are distinguished by fraction: fine, medium and coarse-grained. Fine-grained contain grated sand. Such plaster should be applied only with a thin layer, not more than 1 cm, otherwise it will crack. The most popular ones are medium-grained. They are universal, they are used everywhere in rooms with normal humidity for walls and ceilings, the maximum thickness of such plaster is up to 5 cm.
If it is necessary to apply a thicker layer, coarse-grained mixtures are used. They are used to repair door slopes, corners of rooms, make arches.

Also found moisture resistant gypsum plaster for wet rooms.This is suitable for decorating kitchens, especially in the area of aprons, and bathrooms. It is undesirable to use it as a finish, but it is perfect for ceramic tiles or staining.
Distinguish between starting and finishing plaster mixture. The start-up is used to eliminate gross defects and deep cracks, it can be set to the invoice, repair door and window openings, to level out the walls falling through. The maximum layer of plaster is at least 3 cm. Finishing plaster is used for interior decoration, eliminates minor defects and requires puttying and glossing. Usually the layer thickness does not exceed 0.5 cm
For the decoration of facades, gypsum-polymer and gypsum-mineral compounds are produced.Gypsum-polymer are used for concrete and gypsum-concrete surfaces, as well as of silicate brick. They are applied in a thin layer, have greater strength and frost resistance compared to conventional gypsum mixtures, light but dry longer. Often, polymer facade plasters have a relief pattern. Gypsum-mineral mixtures are more plastic due to mineral plasticizers, which also act as a binder.
Despite additives that increase resistance to temperature extremes and atmospheric phenomena, gypsum plaster is not recommended for use as a topcoat. Anyway, it will absorb moisture and eventually become unusable. Exception - regions with a dry climate and rare rainfall
It is optimal to use gypsum-based plaster as an intermediate layer between the wall and the facing material, for example, tiles or stone.
There are mixtures and the method of application.
- For manual work, the compositions contain less chemistry, the setting time is 40 minutes.
- With machine application, more time is required for work, therefore, the composition contains special additives that increase the setting time by 2-3 times (1.5-2 hours). First, the master needs to apply the solution to the walls, and then they just begin to align with the rule. Often dry mixes for machine application contain crushed sand. It contributes to better mixing of the mixture and its unhindered flow through the gun.
Most often, the stucco is found in white and gray, but pink and beige can be found. Lime-gypsum plaster has a whiter color due to the added lime. Titanium and zinc white in the composition also give white color. If necessary, dye can be added to the solution, the main thing is that it is combined with gypsum and additives in the mixture.
Packing of gypsum plaster is carried out in bags of 5, 25 or 30 kg. It is important to pay attention to the expiration date, which does not exceed six months in tightly closed bags.
Types of stucco gypsum mixtures
Plaster compositions with gypsum are diverse. They are divided by several parameters.
All of them are divided by scope into:
- universal gypsum plasters,
- gypsum plasters for outdoor use (new mixes with special additives used outdoors),
- gypsum plasters for interior use.
According to operational conditions:
- for dry and normal rooms,
- for rooms where the humidity level periodically rises, but not higher than 75% (subject to waterproofing coating).
At the place of use:
- universal (wall and ceiling),
- high strength (for floor screeds),
- only for walls (vertical surfaces).

For the purpose of use:
- Draft for the base layer. Base formulations contain coarse sand, so they can be applied in a thicker layer. Such a coating can also be used for decorative plaster for interior decoration, for example, a Venetian or Moroccan, facing work.
- Finishing or finishing. Grain filler up to 0.63 mm allows you to get a smooth (glossy) surface with a minimum layer of 2 mm.
- gypsum plaster for manual application,
- SSShS for mechanized plastering of walls.
The composition (content of the main components) distinguishes:
- dry gypsum plaster mixes (SGHS),
- gypsum-polymer SS (dry mixes), for example, GYPSOPOLYMER tm, (with polymer additives providing good adhesion of gypsum to any bases),
- gypsum-polymer putties,
- gypsum filling SS for screeds,
- lime-gypsum plaster mixes,
- gypsum putties.
All of them have their own areas of application, pros and cons, as well as characteristics.
Fillers
To prevent cracking, as well as to reduce the cost, to give new properties to the plaster compositions, fillers are introduced.

In gypsum mixtures for this use:
- sand (quartz, limestone, river, etc.),
- sawdust (the so-called “Armenian plaster” contains sawdust sifted through a sieve with 5 mm mesh),
- flour (limestone or dolomite),
- ash
- a piece of chalk,
- perlite (light solutions),
- mica and others
The type of the mixture dictates the dispersion of the aggregates (the ratio of the surface area of the particles to the volume occupied by the particles): limestone and quartz sand with a dispersion of up to 0.8-1.0 mm are used. The ratio of aggregates by fractions should be approximately equal.
Additives
Modifying additives increase mobility, adhesion strength, plasticity of the mixture, slow down the rate of setting, reduce the possibility of cracking.
HSS have too early setting. Therefore, retarders are added to the mixtures. One of the moderators is hydrated lime. Its additive also improves ductility and reduces shrinkage deformation.
Set inhibitors or inhibitors include citric acid. To slow down the setting until 30-40 minutes, when mixed with water, add 10-20 g of food or industrial citric acid.

In the kitchen or in the household, you can find other moderators:
- milk with a fat content of 3.2 (replace 10% of the amount of water),
- PVA glue (glue 1 part, water 3-4 parts),
- washing powder (per 5 kg of gypsum - 100 g),
- wallpaper glue
- liquid soap or fairies,
- putty Vetonit (for four parts of gypsum take part of Vetonite, mix it dry or first dilute Vetonite in water, and then plaster is mixed with this liquid),
- plasticizer for concrete mixtures.
To reduce shrinkage and cracking, cellulose fibers are introduced, and polymers are introduced to increase the bonding forces and reduce water absorption.
Also used are bleaching additives - lime, white (zinc or titanium).
Pure tap water is required for diluting HSG. Only cold water is taken. The quantity is indicated on the package.
Advantages and disadvantages
Unlike cement and lime, gypsum plaster, the pros and cons of which are mainly determined by the characteristics of gypsum, has the inherent property of it to form a smooth, almost glossy surface that does not require additional finishing. It can also be applied without reinforcing with a thicker layer (Volma allows the application of a layer up to 6 cm thick).
The unique natural material has such advantages as:
- environmental friendliness (does not emit harmful substances, is completely natural, has an acidity equal to the acidity of human skin - 5.5),
- vapor permeability, contributing to the improvement of the microclimate (a breathable coating that absorbs excess moisture and gives it away when the room air is dry),
- universality (suitable for covering masonry, wooden walls, concrete, aerated concrete and other surfaces),
- ease of restoration (after repair of its traces it is not visible),
- ease of decoration (takes the form with the finest sculpting, it is easily painted),
- easy mixing in the manufacture of mortar mixtures,
- non-shrinking (does not form cracks during shrinkage),
- small dead weight of the coating (porosity can be 40-60%, depending on the amount of mixing water, pore sizes up to 3 microns),
- quick hardening and strength gain,
- ease of grinding the finished product,
- not combustible, fireproof,
- consumption with the same layer thickness is 2 times less than that of cement plasters,
- not stratified
- not dehydrated
- low thermal conductivity
- high ductility
- It has high adhesion to all types of adhesives and coatings.
The disadvantages of gypsum plaster - it hardens quickly, is non-bactericidal, has low frost resistance and low water resistance. The latter is considered the main drawback. To mitigate the shortcomings, various additives are used.
What the expense depends on
In order to stock up on the amount of GHS needed for plastering, measurements and calculations are made. The packages indicate the approximate consumption when applying a layer of gypsum plaster with a thickness of 10 mm per 1 square meter. Therefore, it is necessary to calculate the arithmetic average thickness of the layer for the surface that they are going to plaster. If the walls of the new home are almost perfectly flat, then you can take into account any given value (say, the minimum). Then simply summarize the area of the ceiling, walls, columns, etc. and multiplied by the value of the minimum layer taken in cm (0.5 cm), and by the rate of gypsum plaster consumption per 1 m2 of wall specified by the manufacturer. The resulting value is multiplied by 10-15% for the margin of error and the fact that part of the solution falls to the floor.

If the walls are uneven, then the middle layer is calculated for each of the walls (as well as other surfaces), on which the consumption is calculated (also by multiplying the area by the average thickness (in cm) and the gypsum plaster consumption by 1 square meter.
The average layer thickness is determined by measurements along the beacons. Along them, at 3-4 points (1 beacon) measure the distance from the surface of the lighthouse strap to the wall (perpendicular to its surface). By measuring the distances for all lighthouses on the wall, the sum of the distances is divided by the number of measurement points. Get the average thickness of the layer.
You can also calculate the volume of plaster on a gypsum basis and, multiplying it by the density of the mixture, get in kg the required amount (weight).
The first thing that depends on the consumption of GHS is the degree of unevenness of the walls. The second factor is the technical characteristics of the mixture itself. Thirdly, the degree of craftsmanship of the plasterer (less mixture gets into the waste).
SGHS are usually sold in paper containers of 30 kg. Calculating the number of bags, divide the calculated weight by 30 kg, the resulting figure is rounded up to an integer in the direction of increase.
How to plaster walls with gypsum plaster
Due to the characteristics of the GHS, the process of plastering surfaces with them differs from the application of cement and lime mortars. Work is carried out at an air humidity of not higher than 60%, a base temperature of at least + 10 ° C, plus air temperature (above + 5 ° C). The metal parts of the tools must be stainless steel. The order of plastering - ceilings, walls, slopes.
- foundation preparation with the installation of beacons,
- mixing the solution
- applying a plaster layer to the beacons and leveling,
- preparation for finishing (grouting and glossing).
For drying the plaster layer (
5 days) provide ventilation, avoiding drafts in the room.
Tools are periodically washed with water, and the container for preparing the mixture is immediately after it is released. The ingress of particles of the previous solution dramatically reduces the setting time of the new one.
Foundation preparation
Before plastering the walls with gypsum plaster from the surface of the base, various layers are removed (old peeling plaster coating, wallpaper), growths, oil contaminants, cleaned from dirt and dust. Remove old nails and other metal parts. If it is impossible to remove them, they are covered with corrosion protection.
Rust will eventually come to the surface. Working with gypsum plaster requires protection against corrosion of all metal parts under the coating.
The base is primed. Thick glossy concrete walls are covered with Concrete contact.Moisture-absorbing substrates (foam, expanded clay, and aerated concrete, etc.), as well as rough and porous concretes - with deep penetration primers, for example, Grundirmitel. Apply the primer with a roller or brush, after which the base is dried for at least 3 hours. Wrong choice of primer mixture and non-compliance with the technology of its application often cause the coating to peel off.
If the plans are to apply plaster without putty (with gloss), then the electrician is performed after priming and installing the beacons, but before applying the mortar. Because on the glossy surfaces the gate cannot be closed imperceptibly. Podrozetniki are placed in the same plane with lighthouses. They are embedded in the same mixture that the walls will plaster, checking their level with the rule, until the gypsum has frozen. After the mixture has set, a wire is inserted into the socket and twisted into a ring inside the socket. After that, they are sealed with masking tape, the excess of which is cut off with a clerical knife. When applying gypsum plaster on the wall, adhesive tape reliably protects the socket from getting the mortar inside. After grouting is done, the adhesive tape is carefully cut out.
Further on how to mix gypsum plaster.
How to breed gypsum plaster
To prepare the solution, prepare a clean plastic container. When working alone - no more than 65 liters, when working together, three or more - a larger capacity. Cold water is poured into it from a water supply system from a proportion of 18 liters per 30 kg of SHHS (0.6 l / 1 kg). First, 8-10 masters of HS are poured into it, stirred
2 minutes. Then, gradually, stirring, pour the rest of the mixture. Stand for about 3-7 minutes and mix with a mixer. Do not add dry mix after aging. All cooked mass should be laid within 20-25 minutes.
If you do not have experience with a quick-setting mixture, reduce the volume of the prepared material until you get used to it.
Beacon Installation
To install beacons, the walls are hung vertically and horizontally. To do this, stepping back from the top of the wall and each of the corners on
30-40 centimeters, drive dowels from a material that is not amenable to corrosion. Their hats should protrude above the base for the planned thickness of the plaster layer. According to the plumb line 30-40 cm lowered from the hats, another 2 dowels are installed above the floor. Pull the cord diagonally and horizontally, determine the place where the layer thickness will be minimal. After that, the cords are moved, moving on the dowels, closer to the wall and expose them to the minimum layer thickness, which is planned for future plaster. On the vertical cords, 2-3 dowels are installed, the caps of which have the height of the cord above the wall, or are already hammered into the desired size. They are needed for the installation / manufacture of beacons.
A solution is thrown along the cord line (slightly higher than the plumb line). Then they take a long building level, moisten it with water (so that it does not stick to the solution) and install it on the dowel caps (the level ruler plane should be perpendicular to the wall). In this case, the level is slightly pressed into the solution. Then with a spatula (on both sides of the level) remove the solution protruding from under it. The level is cleaned in a downward and sideward direction. On the wall there remains a lighthouse of gypsum of rectangular cross section. Such a beacon does not need to be removed after plastering. Saves time and effort in removing the lighthouse and sealing grooves.
The installation of metal beacons takes place in the same way. Only instead of gypsum, a lighthouse is pressed into the wall on gypsum “cakes”.
The step (distance) of the installation of beacons is determined by the length of the rule. It is 20-30 cm smaller. If the beacons are made of a galvanized profile, then a line is drawn along the plumb line on the wall, onto which every 30 cm a slap is applied to the solution, into which the beacons are pressed, controlling the surface vertically and horizontally. The installation is checked using a plumb line.On the internal and external corners set (also on mortar slaps) mesh corner profiles in the same plane with the beacons of adjacent walls.
The beacons are removed when the solution has set slightly. In order to make the edges of the grooves even, you can cut a layer 6 mm from the lighthouse on both sides. Grooves close up with a solution.
Application
Probably, how many masters, there are so many features in applying GHS. There are many variations, you can get acquainted with them on the videos on the video.
The procedure for applying the solution to the wall in a thick layer.
- With large slaps (one to one), the mortar is applied with a trowel to the wall, covering the entire surface (without gaps). At the same time, the entire amount of kneading in the basin is developed at a time, trying to keep the edge of the plastering horizontal line. Since the layer is thick, kneading to cover the entire gap between the two beacons is not enough.
- Using a grater, level the applied material, slightly pressing the solution against the wall and squeezing out air bubbles. The thickness of this layer should be such that between its surface and the rule attached to the beacons there should be at least 1.5-2 cm. This distance should be maintained throughout the plastered area so that the next layer is even in thickness. Where the wall comes closer to the rule, you do not need to apply the first coat.
- Having leveled the layer, the sharp end of the tool draws wavy long lines on its surface that run from top to bottom (the more the better), covering them over the entire surface of the solution.
- Apply the first layer to the next area. Again, level with a grater. Check the rule for the remaining clearance. Draw the lines again with a trowel angle. So to the end of the wall.
- Let the layer dry.
- With a spatula, apply a second layer with small backlogs and smooth it with a grater, leading it horizontally. In this case, the new solution is engaged with the grooves of the first layer.
- The solution applied in small areas is smoothed out as a rule. And they fill the next section with the solution according to the same scheme (they applied, leveled, and extended the rule).
- After completing the work between the two lighthouses, they proceed to the neighboring section.
- When the wall is plastered, the mortar is allowed to set for approximately 40 minutes.
- The rule cuts the protrusions remaining after editing along the entire wall.
- They take out the beacons and once again cut the irregularities with the rule diagonally attached to the wall, conducting it horizontally.
- Diluted with a thick solution cover the strobes.
Start to plaster from the ceiling. Gypsum plaster mixture is applied with a large spatula or a wide trowel towards yourself. Some plasterers spread a trowel over the mixture. Some craftsmen apply plaster on the wall from top to bottom, others from bottom to top. Work front - filling the area between the lighthouses. There are differences too. Some apply the mixture in small areas, immediately leveling the rule, while others, working quickly, spank the entire area between the two beacons (this is not recommended for beginners).
If the coating thickness is large, the solution is applied in two or 3 layers. In this case, a notched trowel is applied to the not yet hardened first layer. The second layer is applied to the dried previous one.
Alignment
Usually, when plastering walls with gypsum plaster, do-it-yourself mix the mixture with the n-rule in a zigzag direction from bottom to top. There is no need to stretch the rule from floor to ceiling at a time. You can align the areas to a height of 1 meter, removing the excess with a spatula (trowel) from the rule and sending them to the wall where there is not enough solution. The corners are aligned with an angular spatula.
The solution that has fallen to the floor is not reused. It is not added to the container with the mixture, otherwise the lifetime of the mortar mixture is drastically reduced.
After the solution ceases to be pressed with a finger (45-70 minutes after the start of setting, or 65 after mixing), the protrusions are cut with a wide spatula or trapezoidal rule.The surface after cutting is suitable for facing work with tiles.
Grout and gloss
In the case when the coating is prepared for wallpaper or painting, after exposure
15-20 minutes (95 minutes after mixing, when the surface is pressed by a finger), grout the gypsum plaster with a hard grater (felt or sponge) moistened with water. This aligns the remaining spatula marks or rules. Wetting (this and the following) should be plentiful. After waiting for the dullness to begin to appear on the rubbed surface, they begin to smooth down with a wide movement of a wide spatula or stainless steel smoothing machine. At the same time, cement milk appears on the surface, which fill the dimples and large pores. An ideally smooth surface is obtained if, within a day after the solution has set (not earlier than 2 hours after mixing), it is abundantly moistened with water and smoothed again. After this treatment, puttying is not required before painting.
After plastering the ceiling so that possible cracks do not go from the walls to its center, the applied coating near the walls is cut along the perimeter of the room to the entire thickness of the layer.
To obtain a relief decor after leveling the laid mixture as a rule, the coating is rolled with a relief roller or a pattern is applied with a forming tool. Smooth coating can also be used for decorative plaster for interior decoration, for example, a Venetian or Moroccan.
See also videos on how to properly plaster walls with gypsum plaster.
What to paint
Gypsum materials without compaction are porous, minor irregularities are possible. Therefore, it is possible to solve the problem of the need for puttying after applying gloss on a gypsum wall by looking at the surface, illuminating it with side light. In any case, it is primed before the putty and painting, and the surface does not need to be glossed under the putty (for better adhesion). Putty layer - up to 2 mm (polished in a day).
Acrylic water-soluble paints (water emulsions or dispersions) are used for painting. Sometimes (much less often) apply oil paint. The paint is applied after the gypsum has completely dried. You can use other materials for painting the finishing plaster. For example, if you saturate the finish with shellac-rosin solution in alcohol (sold ready-made) or with warmed linseed oil, this will make the surface look like aged marble. Such impregnation additionally protects from moisture.
Frequently asked Questions
- Is it possible to glue wallpaper directly on gypsum plaster? - For wallpapering, the surface of the coating must be primed and, if the surface is grainy, it is puttyed. Glossy white trim will not shine through the wallpaper. It is enough to ground it so that the gypsum does not draw water from the wallpaper glue.
- Why does gypsum plaster harden so quickly? - This can happen for several reasons. For example, if you use warm water for the solution, the rate of chemical reactions increases. A sharp acceleration of crystallization causes the ingress of ready-made crystals formed in the previous batch or even a piece of old gypsum wall plaster into the solution. Therefore, it is necessary more often to thoroughly rinse the tool and wash the containers (after each kneading worked out), you cannot throw the solution that has fallen to the floor into the container, etc. Acceleration of setting also causes long-term storage of GHS and storage in open packaging. GHShS - counterfeit.
- Do I need to putty the wall after gypsum plaster? - Yes, if she did not gloss.
- Is it possible to lay a brick directly on gypsum plaster? - No. For a number of reasons, it cannot be used as a masonry. Brick is a porous material, it will draw moisture from a fresh mortar. As a result, the coating does not gain the required strength. And nobody will prime each brick.
- Gypsum plaster hardens too quickly, what should I do? - You can knead a small volume of the solution with the addition of retarders for the sample. If retarders do not help, do smaller batches to have time to work them out.
- Is it possible to apply gypsum plaster screed on cement? - Yes. For this, the cement surface is primed.
- How to put a cement plaster screed on an existing gypsum plaster? - This cannot be done, since cement is a shrinking material. It will tear a less durable coating.
- How can I make homemade gypsum plaster? - The above are recipes. However, you need to be prepared for the fact that economically or in terms of time will not cost a sheepskin dressing.
- How can you for sure distinguish fake gypsum plaster? - It is possible to distinguish a fake only by directly comparing the behavior of the mixtures during dilution and during operation. Therefore, it is easier for non-specialists to be attentive to the packaging details (paint quality, packaging material and other details).
Comparative characteristics of plasters from different manufacturers
GHShS of several modifications are contained in the lines of different manufacturers. If we compare the leading manufacturers that produce the best gypsum plasters, we can note that each of the manufacturers has its own approach. If Volma often experiments, obtaining new mixtures of interesting properties, the German Knauf emphasizes the quality of an almost classical formulation. At the same time, Knauf mixtures are much more expensive; they require multilayer application and special primers. SS Volma, having its own advantages, is only slightly inferior to Knauf in the quality of gypsum.
| Specifications | Compare Brands | |||
| Knauf | Volma layer | Bolars | Miners | |
| Dry mix consumption (kg / m2) per 10 mm layer | 8.5 | 8-9 | 8.5 | 8-9 |
| The maximum layer, mm | 50 | 60 | 50 | 50 |
| Water consumption, l / kg | 0.6 | 0.55-0.65 | 0.5-0.56 | 0.5-0.7 |
| Full drying, days | 7 | 5-7 | 7 | 7 |
| The beginning and end of setting, min (viability min) | (45-60) | 45-180 | (60) | (45) |
| Features | Suitable for wallpaper | Primerless plastering | Shelf life 12 months, does not require puttying | |
| terms of Use | Wet and dry rooms | Dry and Normal | Dry and Normal | Dry, normal |
As you can see, the average indicators are close. In the end, everyone decides which of the gypsum plasters is best suited in his case, relying on his own experience or the recommendations of specialists when choosing.
DIY gypsum mortar
Gypsum solution is also used in pure form. Castings for wall decor are made from it. In order to prepare a simple solution, pour cold water into a clean container and pour gypsum powder, scattering it over the surface of the water. The powder is added until a small slide grows above the water. Kneading is done with a spatula. You can try stirring with your hands to feel what processes are taking place. A slight warming of the mixed mixture indicates the readiness of the solution.
Gypsum plaster recipes
To prepare the solution yourself, you can use the following recipes:
- 3 parts of ground chalk + 1 part of gypsum are mixed, then some wood glue is added. Pour into cold water and mix.
- In a container, 1 part of drying oil, 2 parts of gypsum, 0.1 part of NF-1 drier are mixed, and after adding water, they are mixed.
- The usual plaster mixture is 1 hour, wood sawdust - 1 hour, gypsum 4 hours, mixed, then diluted with water.
In these mixtures, you can add fillers, the description of which is given above (not more than 10% by weight of the mixture), as well as modifying additives. Before kneading a large volume, it is rational to first test the mixture on trial batches.
It is impossible to combine cement and gypsum in gypsum plaster at home if you do not want the finish to become cracked. But you can create a lime-gypsum mortar with your own hands.
The consistency is considered correct if the stucco mortar keeps its shape, does not float on the wall after application and stretching.
Plaster softeners
Plasticizers are substances that regulate the crystallization of gypsum with a different chemical base. They are added for:
- increasing the strength of the solution (due to the reduction of water absorbed by the gypsum, the gypsum is harder the less water is used),
- increase in fluidity,
- providing waterproofing and good shrinkage,
- lowering the freezing point of water,
- hardening acceleration in cool conditions
- adhesiveness
- increase air permeability, water resistance.
The concentration of plasticizer can adjust the setting time.
Some of the popular brands are: Fluid Premia 325, Vianplast, Sika ViscoCrete-G2, Freeplast.
Plasticizers for concrete are not suitable for gypsum. Unlike white (for gypsum) they have different colors (brown, yellow, gray).
Indoor and outdoor use
It is mistakenly believed that in the bathrooms the decoration of plaster is unacceptable. However, the toilet rooms belong to rooms with short-term high humidity. Therefore, GSHS is not only possible, but also desirable to use in them. The only condition is that waterproofing is arranged in places of direct water ingress. In the shower rooms, waterproofing is done completely. Waterproofing choose the one that is suitable for application to the base of gypsum.
As a waterproofing, a deep penetration primer applied in 3-4 layers is often used.

It was believed that it is impossible to plaster facades with gypsum mortar, where rains and large temperature differences are constant. The new SGHS compositions (gypsum-mineral and gypsum-polymer) are used for outdoor work. Gypsum-polymer compositions are used even for silicate-brick masonry, as well as for a thin layer leveling concrete. Polymer modifiers increase frost resistance and coating strength. Mineral plasticizers are used in gypsum-mineral formulations, which are additional binders.
Storage conditions
GHShs have an expiration date. Usually this is 6 months, after which the structure of the SS deteriorates (for Vetonit LR + shelf life of 1 year). This happens even when the correct storage conditions are created, which are as follows:
- storage in undamaged packaging of the manufacturer (partially protects against moisture),
- the storage room is dry, air humidity no more.
- compliance with the temperature regime, to which some additives are especially sensitive (there should not be sharp fluctuations and subzero temperatures, since GHS are frozen),
- Kraft bags with mixtures are stored on wooden pallets.
If the age of the SHS is longer than the expiration date, then it can be used. Make a trial batch, reveal what characteristics of the mixture have changed. For example, setting time has been reduced. In this case, the batches are made smaller and used either as a starting solution, or where the coating strength is not so important. When reducing the setting time, the SS can be diluted with water with the addition of ½-1 cup of PVA (or glue for wallpaper) on a bucket of water.
Gypsum behaves like cement. Its expiration date
The article provides answers to questions about how to apply, how to smooth and how to grout the plaster, whether many others need to be primed. Plastering the walls with gypsum plaster with your own hands is a rather fascinating occupation, requiring ingenuity, mobility and observation. In exchange - daily pleasure from self-awareness as a creator, contemplation of smooth walls and living in a favorable microclimate.
Bark beetle
The main parameters of such decorative gypsum plaster:
- Polymer and mineral additives. With them, the material becomes lighter, and this reduces the load on the wall.
- The absence of toxic substances, the content of only environmentally friendly components.This mixture can not be afraid to apply in bedrooms, rooms with high humidity.
- Fire resistance. Withstands temperature extremes within -55 to 60 degrees. It does not fade in the sun, does not lose its initial appearance.
- Resistance to mechanical influences. Safe to clean with sponges, vacuum cleaner.
- Perfect color when painting. The base shade of the bark beetle is white. But white is easy to color.
"Bark beetle" is not suitable for sealing defects, shells, cracks. It is sold in the form of a finished mixture or dry concentrate, which must be diluted with water according to the instructions. The main indicator of the mixture is the granularity: the higher it is, the greater the consumption.

"Fur coat" on the surface texture strongly resembles a turned inside out and slightly crushed sheepskin. It varies in composition and method of application:
- Mineral. The composition has astringent lime, cement and sand. To improve the properties, plastic, fire-resistant substances are added. In many cases, you can find additional elements that prevent decay, make the composition resistant to sunlight.
Acrylic gypsum plaster consists of polymers that are susceptible to fire. Therefore, do not place the finish close to the source of fire.
All the advantages of a "fur coat" are the same as that of a "bark beetle". The only drawback is the ability to accumulate dust. Such coatings require regular wet cleaning.

Pebble
Pebble gypsum mixture is made from synthetic binders. It has increased ductility, elasticity. Cracks, deformations, breaks are not peculiar to it. There are acrylic, silicate and combined mixtures. Depending on the content, there are:
The coating structure is created due to the size of the stones.
- There are cement-based pebble mixtures with cementitious polymer components, which are sold in powder form. In its composition, this material does not contain dyes.
- There are also acrylic mixtures. They are of high quality, easy to apply, hold on any surface.
- Silicate pebble gypsum mixtures basically contain liquid glass. Due to this content, this plaster dries quickly, is waterproof, durable, anti-static. It is applied on aerated concrete surfaces.
- If we talk about silicone plaster, then it contains synthetic rubber and silicone resins. It holds well on all types of surfaces, has water-repellent, antifungal, bactericidal properties. This is the most expensive type of pebble plaster with the longest service life after application.

Types of plaster
The main principle for choosing plaster is its purpose. It is necessary to consider where the work will take place: indoors or on the facade. What properties should the mixture have, and what is the basis for the finish made of.
All plasters are divided into three large groups:
- simple (for leveling the surface),
- special (compositions with additives to improve individual characteristics),
- decorative (finish coatings that do not require additional processing).
Internal plastering of the walls of the house requires that the composition is safe and perfectly smoothed. For outdoor work, a mixture resistant to adverse environmental factors is necessary.
Cement

Dry mix of cement and sand. The ratio of components in the composition is on average 1 to 2-5, respectively. Before applying, mix with water until the consistency of thick sour cream.
Cement plasters are used for interior and exterior use. To improve ductility and adhesion, plasticizers and PVA glue are added to the composition. When working in rooms with high humidity and on the street, slaked lime is added to the solution.
It is applied by 3-5 layers.The maximum thickness of one is not more than 20 mm, optimally 10 mm. The total coating thickness can reach 100 mm, but reinforcement is required.
The task of this composition is to smooth out irregularities for further decoration. Suitable for brick, concrete and wood substrates. Before applying the surface is primed, then we plaster the walls in three stages (spraying, primer, coating).
It is applied by hand and machine, leveled with spatulas and the rule.
Decorative
Mixtures of decorative plaster perform two functions at once: they hide minor defects and give an aesthetic appearance. No additional finishing is needed. Pigments and insoluble granules made of stone, sand, and plastic are added to such compositions.
Depending on which mixture and technique of wall plastering is chosen, a different pattern, relief, pattern or texture is obtained.
It is made on an acrylic, silicone, silicate and mineral base. If you follow all the rules of wall plastering, it adheres well to any substrates. There are compositions for exterior and interior use.
Positive features and disadvantages
 In favor of gypsum compositions is the fact that statistics indicate an increase in their demand in recent years by 1.5−2 times compared with previous periods. The benefits of gypsum mixes include to various qualities plasters:
- ecological purity of the material used allows it to be used in residential premises without the risk of harm to humans,
- due to plasticity, the layer is applied to surfaces subject to certain vibrations from concrete, brick and other materials,
- the solutions are used in the decoration of walls made of foam concrete, applied to the foam insulation, expanded polystyrene due to the high ability to adhere to the base,
- mixtures are successfully used as an insulating layer, to protect the insulation layer from moisture,
- the finish is not subject to fire, maintains uniformity in frost, its surface is not susceptible to corrosion,
- thermal conductivity is lower than that of cement-sand mortars, therefore gypsum is “warmer”.
Some disadvantages limit the use of gypsum plaster, application in some conditions becomes impossible or difficult:
- gypsum behaves poorly in conditions of high humidity, they do not finish surfaces in bathrooms,
- Compared with cement-sand mortar, it has low durability,
- the implementation of gypsum mixtures after mixing the solution should occur faster than cement,
- the cost of gypsum composition is higher than the cost of cement-sand compositions,
- low resistance to mechanical damage.
Plaster mortars for indoor decoration
 Dry mixes for performing a decorative surface are popular, they are suitable for a base of any material. When applying a decorative mixture, special attention is paid to the last layer. Thin and fat layer of material differs in hue, therefore, preliminary alignment is required so that the plaster lays in the same layer. The final texture of the plaster hides small cracks and additionally insulates the wall.
Venetian plaster
 In the composition of the solution, crushed marble serves as a filler, therefore, as a result of final processing, it turns out marble surface. With the help of pigments and dyes, the finishing layer is given the desired shade. After completion of work, the composition becomes moisture-proof, which is important in conditions of high internal humidity.
Temperature differences are not terrible for Venetian plaster; therefore, it is recommended to decorate walls in unheated or irregularly heated rooms with it. During operation wear out slowly and does not absorb unpleasant odors.
Structural plaster
 The structure on the surface of the layer appears as a result of the addition of various additional inclusions - small stones, mica, quartz, wood fibers are also used. Bonding components As a part of the layer, it is made elastic and plastic, such a finish does not crack upon drying and does not shrink.
For internal wall decoration, water-based material is used, and for non-residential premises and external walls, plaster based on synthetic latex or cement.
Textured plaster
The composition contains silicone resins that help to create any texture on the surface of the wall or ceiling and increase the reliability of the coating. Blends are marketed in a wide variety of colors. To plaster a large plane, they acquire a mixture from the same series, since different ones give a difference in shades.
All rooms in the house are treated with textured plaster. Its strong connection with the base allows you to complete the work in a short time, and the service life is quite long.
Dry Plaster Manufacturers
Manufacturers produce gypsum plasters for interior use, characterized by characteristics, aggregate size, flow rate and recommended layer thickness.
Gipswell presents a series of compounds developed by the Founder enterprise in Russia, they are intended for rooms with a normal humidity indicator and are represented by the following brands:
- the gray mass of Gypswell PG25 is intended for manual application, after kneading it is suitable for work for an hour and a half, a layer of up to 8 cm can be made, with this thickness about 9 kg is consumed per square area
- the white gypsum mixture PG25 W is used in a similar way, but its original color is white, so you can add dyes,
- the white mixture Gypswell PG26 MW is applied by hand and machine, used as a final coating.
GIFAS is also of domestic production; three brands are on sale:
- GIFAS START mixture is used in rooms with normal humidity, the permissible layer thickness is 10 mm, the consumption is from 10 to 11 kg per square wall, the production time is 50 minutes,
- the composition of GIFAS MN is applied manually and by machine, the layer thickness is slightly less - up to 7 mm, the setting time of the working solution begins after 40 minutes,
- GIFAS PREMIUM gray plaster is characterized by increased vapor permeability and is intended for initial leveling to a thickness of up to 8 mm.
The Etalon brand is produced by the Etalonstroy enterprise, it is an excellent combination of price and quality, it is represented on the market in two types:
- ClimLife gray mixture of light shade is designed for manual production of a layer up to 50 mm, it must be worked out within an hour at normal humidity, it is distinguished by strength and elasticity,
- ClimLife MN dry solution is made for machine application, repeats the characteristics of the previous brand.
Bergauf only produces plaster mixes for manual application in rooms with normal humidity. On the construction market is represented by the following brands:
- EASY BAND is used to level the surface no more than 40 mm, gray, plastic and mobile, viable after kneading for an hour, the manufacturer recommends as a heater because of the content of perlite.
- PRIMA PUTZ GIPS differs in the average size of the filler, it is used for applying a layer under the wallpaper, white, used as a finishing texture for painting.
- BAU PUTZ GIPS is recommended as the basis for the finishing decorative layer of fine-grained plaster.
Other common brands
The compositions of some manufacturers are used in various areas of finishing work. Dry formulations have impact resistance, hydrophobicity, and resistance to sunlight. These include:
- gypsum mixtures for heated rooms of the Perfect,
- Stucco will defeat Aegis for alignment and insulation inside and outside the building,
- Knauf brand is represented by a wide variety in which the consumer will find the right brand of excellent quality,
- dry facade mixtures Rotband machine and manual application produce products that have proven themselves in humid conditions,
- Volma products are of constant quality; the range includes brands for use in high humidity and on external walls.
Material consumption
This indicator is affected by the thickness of the coating and the surface condition. The consumption of plaster per square meter of an area 1 mm thick is indicated by the manufacturer on the packaging. To calculate the total amount of material on the wall, the verticality of the wall corners is checked using tools, and the level of the ceiling is measured with a level.
Measure the layer in the protruding part and in the deflections of the surface, based on these values, find the average reservoir size (in millimeters) and multiply by the weight indicated on the package. The more measurements are made, the more accurate the required amount of dry mix will be.
The stages of plastering
Be sure to carry out the preparation of the base, which consists in cleaning from old layers, mold. Too large bulges constrain, since a lot of solution is used to raise them to their level. After that, the surface is primed. If the base is weak, then priming is done twice:
- the first layer is diluted weaker than recommended by the manufacturer, for deep penetration into the wall,
- the second is done on the recommendation on the packaging after the first layer has completely dried.
Beacons are placed for precise alignment, which greatly simplifies surface alignment. They use perfectly flat wooden battens or a metal profile for this, which they strengthen with mortar or hardware over the entire surface of the wall.
Application of the solution during leveling or topcoat is done several times, since the first time it is not possible to achieve a result. Use a trowel and a spatula, large thick layers when dried, shrink or crack, subsequent application is required. After final sanding, paint is applied.
Application Methods
Plaster decorative plaster can be applied in two ways:
- Manual. Dilute the solution in containers, trowel it onto the base, starting from the bottom and moving up. The lower layers should be thicker than the next. Using the Rule, each section should be aligned in the same direction by oscillatory movements from side to side.
- With a spatula straighten, close up all the flaws (visible after closing strokes, chips, protrusions).
- Then the rule in the form of a trapezoid is to trim the traces and irregularities.
- It is necessary to periodically carry out a spatula on previously laid plaster from the bottom up to avoid sagging.
- Machine. A special device consists of a container for a solution, a hose with a gun in the form of a nozzle, a compressor, a power cable and a control panel. Buying such a complex for one time is unprofitable and expensive. You can rent a car or invite professional finishers.
The finished mixture is placed in a container, from the control panel it is supplied under pressure through a hose. The correct location of the gun when spraying the mixture is 3 cm from the wall. Layers should overlap each other. At the last stage, the surface is rubbed by hand.
Silicone
Compositions based on silicone are used for external and internal wall plastering. The mixture remains flexible even after drying, due to this the surface is not afraid of sudden temperature changes and mechanical damage. It tolerates moisture well, therefore it is applicable in the decoration of the bathroom and kitchen.
The finished surface can have the “Bark beetle”, “Lamb” relief or imitate marble (Venetian).It all depends on how to plaster the walls, what tools to use and what size and shape of the solid particles in the composition.

Which is better?
The choice is affected by the list of required jobs. For door slopes and arches, it is better to choose a coarse-grained putty, for walls and a ceiling - medium-grained.
Foreign mixtures are more expensive, but there are domestic ones that are no worse.
If you plan a machine application method, then the plaster should be appropriate. If it is necessary to purchase mixtures of different fractions, then only from one manufacturer with the same composition.
Do not mix mixtures from different manufacturers. Firstly, they may contain various additives that will not work well with each other. All this will reduce the quality of the plaster layer. Secondly, they can have different shades, and the result will not look aesthetically pleasing on the walls.
It is worth paying attention to the composition. If the chemical additives are more than 30%, then such a mixture will be more plastic, grasp longer, can slide on the wall. Such plaster mixes are not suitable for manual application, only for machine application.
Sgraffito
Sgraffito is not a separate type of plaster, but a method of applying it. Using this technique, you can create carved color drawings. As a result, the plastered walls look like real paintings.
To create a beautiful effect, pigments are added to the compositions on a different basis and plaster is applied in several layers that differ in shade. Then, on a dried finish, patterns, ornament, figures are cut out.
Decorating walls with sgraffito plaster requires skill and experience. A person who knows how to draw and work with the mixture will cope with this task.

The better to plaster the walls
Which plaster is best for leveling the walls depends on a number of factors: the size of the differences in the base surface, resistance to moisture, type of finish, operating conditions.
| Criterion | Cement | Gypsum | Decorative |
| Roughness | Up to 100 mm | Up to 50 mm | 8 to 17 mm |
| Moisture resistance | Yes | No | Yes |
| Finish coat | Suitable for tiles, wallpaper and painting (subject to puttying) | For wallpaper and painting (puttying is not required) | No additional trim needed |
| Operating conditions (temperature, humidity) | from -50 to +80 degrees, at any humidity | From +5 to +30 degrees Celsius, only for dry, heated rooms | From -50 to +75 degrees, tolerates wet environments |
| Recommended Application | The facade of the building, premises with high humidity (kitchen, bathroom, industrial buildings) | Bedroom, children's room, corridor | Depending on the type of binder, you can choose a composition for external and internal work |
Important! The plastering of walls in the apartment requires a mixture of environmental safety, so it is forbidden to use the composition for outdoor indoor work.
Putting plaster on the wall can be done with different tools: wide and narrow spatulas, a special machine. For decorative compositions use rollers with embossed nozzles, trowel, applicator, brushes.
Wall alignment methods
Which plaster is better to choose for leveling the walls is already clear, it remains to determine the method of applying it to the surface.
Plaster can be applied to walls in two main ways: without beacons (by eye) and by beacons. The first method involves applying and leveling the mixture with spatulas, a rule or a trowel, suitable if the surface has slight differences up to 2-3 cm. The second method is more reliable and accurate. For it, a plane of metal profiles is predefined on the walls.
You can determine the size of the differences using a plumb line or a building level, and after that choose which wall plastering technology is more suitable.
The plastering of the interior walls of the apartment is often performed without lighthouses, since the differences are usually insignificant.In industrial buildings with high ceilings, it is better to use beacons.
Necessary tools and materials
To produce plastering the walls will require a large set of tools and materials:
- Hatchet or Kyle hammer (to remove old coat or protruding parts),
- Brush (for applying a primer),
- Primer suitable for the type of substrate
- Plumb or construction level (to control the plane during operation),
- Square (for deriving angles),
- Large capacity (for mixing the solution),
- Construction mixer,
- Plastering spatula and trowel (to add mortar to areas where it is not enough),
- Wide and narrow spatulas,
- Guiding beacons
- Rule and grayscale (for leveling the layer),
- Plaster corners (for reinforcing external corners).
To do-it-yourself wall plastering, you need to study the technology of applying the mixture. If you are a beginner and not confident in your abilities, it is better to entrust the work to professionals than to plaster the walls again. They have all the materials for plastering walls, and they know exactly what is better to plaster the walls.
Preparatory stage
Preparatory work consists in surface treatment before applying the first plaster layer. The nature of the work is determined by the type of foundation:
- Brick surface preparation. For better adhesion, you need to fix the reinforcing mesh or make recesses in the solution between the bricks. This is followed by dust and debris removal and a primer.
- Preparation of concrete walls. If the material is not very dense, make shallow incisions with an ax, then treat with concrete contact.
- Surfaces from foam blocks are coated with a deep penetration primer.
- Preparation of wooden walls for plaster. It is necessary to fill the diagonal slats with a step of 5 cm, so that the solution is better kept on the surface.
On the surface of the walls there should not be large ledges, lagging behind the old coating, metal elements, dust and debris. After the base is prepared, and the primer has dried, you can begin the process of applying plaster.
Application technology

Plastering the walls begins with the preparation of the mortar. For this, the dry mixture is diluted with water in the proportions recommended by the manufacturer. Concrete and brick walls are wetted with water so that the plaster sticks longer and does not lag behind the surface.
The technology of plastering includes three stages. This is a sequential application of three layers of a mixture of different thicknesses and thicknesses.
DIY wall plaster instruction:
- Spray This layer is the most liquid in consistency. It is thrown onto the surface with a trowel with little effort. Then slightly leveled by a falcon. The thickness of the plaster layer is 5-10 mm.
- Priming. When the first layer has set, but has not yet dried, a second layer is applied. It is thicker and thinner. It is placed on a falcon and applied to the wall, then leveled with a wide spatula, with sweeping movements. One portion of the plaster should be enough for about 1 sq. M. area.
- Nakryvka. Layer thickness 2 mm. The solution should be thick. Superimposed on seized soil. His task is to smooth out all minor irregularities. The mixture is no longer sprayed, but smeared with a spatula, pressing a sharp edge to the surface. It is applied by movements from bottom to top. You can move in an arc. After the mixture has set, the surface is rubbed with a trowel.
Other methods of applying plaster are also practiced. For example, in one layer, without spray. This method is suitable for those who do not have professional skills, since only a person with experience can properly plaster walls.
Stucco grout
The last stage of plastering is grouting. Its task is to bring the surface to perfect smoothness. It is necessary to start surface grouting when the last layer of plaster hardens. The work is carried out in stages using different tools:
- Grouting with a trowel with a wooden surface of the set coating layer. It is necessary to smooth the traces of the spatula and tubercles. It is performed without pressure in circular motions.
- Smoothing grater with felt with sharp, direct movements.
- Smoothing with a rubber or metal strip. With these tools, the surface is prepared for painting. Movement first vertically, then horizontally.
After grouting, the wall is cleaned of dust and covered with a primer. You can proceed to further finishing when the surface dries well.

What is lighthouse plaster
The process of aligning walls with lighthouses begins with the installation of profiles that will set the desired level.
Installation of beacons is as follows:
- They screw into the wall near the ceiling and floor by a self-tapping screw, level their position with a plumb. Their hats should be in the same plane.
- Measure the distance between the screws, take 5 cm and cut off a profile fragment equal to the obtained value.
- Between the screws draw a line with a pencil.
- Throw the tubercles onto the line in 3-4 places, the solution of the plaster, press the profile into them, so that its plane converges with the hats of the screws. Remove the fasteners.
- Repeat the procedure at a distance of not more than 1 meter from the first lighthouse. Thus, they create a plane along all the walls of the room.
This completes the installation of beacons, and you can begin to apply the first layer of the mixture. After the plaster has been applied completely, the beacons clean and level the areas where they were.

DIY wall plastering
Do-it-yourself plastering can be done if the differences are not very large and the layer of the mixture does not exceed 2-5 cm. It is worth applying only mixes for rough leveling and decorative ones that are easy to work. For example, to decorate a wall with Venetian stucco with your own hands without experience is too reckless. Complex compositions are best left to professionals.
Some formulations can be prepared on their own. Cement plaster consists only of cement and sand, knowing the desired ratio of components, you can prepare the mixture.
How to make plaster:
- Pour cement of a grade of at least M200 and 3-4 times more sand (depending on what fat content is needed) into a large container or concrete mixer and mix in a dry state,
- Pour water in small portions until the desired consistency is obtained, periodically mixing the composition,
- To improve ductility, you can add a little detergent (based on 30-50 ml per 5 liters of water).
The finished mixture must be used within an hour. Since plastering can be delayed with your own hands, it is not worth preparing a lot of mortar at once.
If you plaster yourself, then you need to take care to protect the skin from the composition, as well as cover the furniture and floor in the room where the work takes place.
Since plastering walls with your own hands without any experience is not easy, you can preview the video, as the masters do.
Saving tips
Significantly save on plastering walls in the apartment is possible only if you independently prepare the solution and apply it with your own hands.
You can reduce costs a little more due to the economical use of material:
- Dilute the composition with water in small portions in order to have time to use it accurately,
- Carefully track the differences in the wall, perhaps in some places it is enough to cut off the mounds and the flow rate of the mixture will be reduced,
- Apply only two layers without a coating, but this is acceptable if the differences do not exceed 1-2 cm.
Plastered walls improve the heat and noise insulation of the room, acquire a flat and smooth plane, ready for further decoration with thin coatings - wallpaper and paint. Some types of compositions also have decorative functions. You can apply the mixture in different ways, but it is important to do everything correctly, otherwise the coating will not last a long time.
Share your experience in the application of rough and decorative plasters in the comments without skills.
Criterias of choice
The choice of a mixture suitable for these actions depends on where the plastering work will be carried out. You can purchase compounds for outdoor use and for plastering such surfaces:
- facades
- basement
- walls with high humidity indoors.
When choosing plaster based on gypsum, you need to look at the instructions for use, it indicates for what types of work the composition was prepared.
In the market of building materials you can meet different manufacturers. We list the highest quality, time-tested brands that deserve the attention of an alert buyer:
- Perfect - for decoration in heated rooms.
- Aegis - for leveling and thermal insulation of internal and external surfaces, when erecting walls of brick, expanded clay concrete, concrete ceilings.
- Volma. A lightweight formulation makes it easy to work with the mixture in an economical framework. Suitable for work in rooms with high humidity.
- Knauf Rothband. She performs exterior and interior work. Suitable for facade decoration.
- Bergauf. It is possible to carry out internal and external works by manual or machine method.
Necessary materials and tools
To work, you will need the following tools:
- rectangular spatula, trowel,
- rule for leveling the plaster layer,
- wide spatula
- trapezoid rule
- sponge grater
- iron spatula
- metal scissors
- level,
- roulette,
- plumb
- beacons
- mounting grid,
- scraper.
If you plan to work on the ceiling, then use the stucco falcon. The grid and beacons on the ceiling are not installed. The reinforcing mesh itself is taken from galvanized metal or plastic to prevent possible corrosion of the material.
Do-it-yourself algorithm for applying mortar to walls
Wall decoration with gypsum plaster is carried out according to the following algorithm:

- Surface preparation. All dust, dirt from the walls is collected with a rag or vacuum cleaner. All irregularities, defects are covered with a base layer of plaster.
- Primer. One or more layers are applied to a clean surface. The faster the composition is absorbed into the base, the more it will need to be applied.
- Installation of beacons, installation of the grid. It is carried out to regulate the thickness of the plaster layer. The location is vertical, with a pitch of 20 cm less than the size of the rule. The minimum layer of gypsum plaster is about 8 cm.
- Preparation of the solution. Dry mixtures are diluted with water in a ratio of 2: 1. Mixer with nozzle is thoroughly mixed. Mixes are mixed in small portions so that the solution does not dry during application.
You can apply the solution with two spatulas or spray the plaster from the spatula onto the trowel, or you can use the machine method. The first option is convenient for small amounts of work, more massive rooms are easier to handle with a spatula and trowel, as the work becomes much faster.
All excess is removed, and the resulting recesses are again filled with plaster mass. The process is repeated until an ideal surface is reached. Evenness is checked by laser or simple level.
Below is a video about applying gypsum decorative plaster:
How to make a decor from a plaster composition?
Decorative plaster of gypsum composition can be done in several ways:

- Gypsum in an amount of 10 kg is mixed with 30 kg of lime dough. To obtain a thick plastic mixture, dilute with water. If necessary, add color. Suitable for work in dry rooms. It can be used on walls, ceilings.
- Lime dough in the amount of 35 kg is mixed with liquid glass (5% of the mass of the solution is taken). It can be used in rooms with little humidity.
- 10 kg of cement, 20 kg of sand, 10 kg of lime and water glass in 5% by weight of the solution are well kneaded. Dilute with water to the desired consistency. Applied for outdoor work and decorative decoration in rooms with high humidity.
Tips & Tricks
Expert Advice:
- It is necessary to adhere to the exact choice of layer thickness, since the flow rate of the mixture will depend on this. For calculation use the following scheme:
But you need to take into account unforeseen expenses, take an additional 10-15% of the value obtained. If you plan to recreate decorative elements, then consumption will increase.
Gypsum decorative plaster is suitable for work both indoors and outdoors. This is a high-quality composition that ideally lays on the surface and serves for a long time. There are gypsum mixtures of different composition. They are selected based on the intended final effect.
What is different from gypsum
Despite the fact that the plaster is called gypsum, the correct name for its main component is alabaster. It is this substance that is presented in the mixture in the form of a fine powder. Gypsum is a generalized name for a rock, from which subsequently the material necessary for human needs is obtained.
Modern gypsum plasters differ from ordinary gypsum with additional mortar properties due to the presence of polymer additives and various inclusions in its composition. Thanks to them, the surface texture, the setting and drying rate change.
The material becomes more plastic, easier to fit, and has enhanced strength characteristics.
Soundproofing properties of cement and gypsum plasters
The ability of materials to absorb noise is of interest to many users. They would like to finish and get not only a smooth wall, but also effective protection from “loud” neighbors. If using standard gypsum or cement solutions, then they will not give good sound insulation. True, the first option has slightly better insulation characteristics compared to the second.
The best choice in this case is special soundproofing materials. They are made on the basis of cement or gypsum. They include a special filler that gives the finish some friability and porosity. This allows her to absorb sound well. A layer of the composition can be covered with drywall or put the final finish directly on it. Subject to the laying technology, such mixtures are very effective.
Solution preparation
It is not difficult to prepare the solution - it is necessary to add water to the dry powder, clearly observing the proportions indicated in the instructions, mix with a mixer to the state of a homogeneous mixture. Then you will need to mix the solution in 5-6 minutes again to finally get rid of lumps and excessive voids. The plaster station automatically mixes the components, so the mixture is better.
Beacon Installation
In work, it will be necessary to use beacons - metal guides up to 3 meters long, which after work are easily removed from the wall.
The first beacon must be installed at a 15-cm distance in order to accurately derive the angle.The following guides are placed 1-1.3 m apart, aligning them vertically with a laser level, and fixing with alabaster. Only correctly placed beacons will allow you to create a flat surface that does not need additional work.
Surface gloss
If the surface is not smoothed, it is ready only for further installation of the tile. For wallpaper or painting, it will need to be shiny to provide it with perfect smoothness, eliminating the need to additionally work with putty.
Glossing is carried out approximately 2 hours after applying the last layer of plaster. The wall needs to be slightly moistened and grated, rubbing into it with the help of a spatula the formed gypsum milk.
Which plaster to choose: cement or gypsum?
According to a number of characteristics, these materials are similar to each other, therefore, it is necessary to consider those qualities and properties that differ from each other.
These include:
- price - gypsum plasters are somewhere 1.5 times more expensive than cement plasters, but gypsum material is consumed 45% less. In addition, if gypsum is applied qualitatively, the surface will not need to be puttied, and the cement coating always needs to be processed. As a result, gypsum plaster will cost less than a cement mixture, especially if a significant surface is processed,
- adhesion and drying time - cement has a higher hardening rate, so gypsum mortar is applied for 45 minutes, and cement - can be applied for 2 hours. The gypsum mixture is formed several times in small portions, otherwise it will quickly become unsuitable for further use,
- the scope of use of mixtures - cement plaster is more versatile, since it can be used for internal and external facade work. The gypsum composition cannot be used on the street - it is characterized by lower working qualities, since it is deformed from excess moisture. By the way, this is precisely why gypsum is not recommended for use on walls of rooms with high humidity levels. Even the use of high-quality waterproofing will not improve the situation.
Important Nuances
Gypsum plaster is suitable for many surfaces. It can be applied to cement and lime plaster, drywall, wood and paint. Also, gypsum mixtures are allowed to work on gas silicate blocks, logs, chipboard and expanded clay concrete. Such surfaces must always be primed. For most of these materials, a conventional universal primer in two or three layers is suitable, and concrete contact is better for concrete floor slabs and paint.
Before you start applying gypsum plaster, you need to carefully prepare the surface. All old decorative coatings are completely removed, remove greasy stains, glue and dust. If the wall or ceiling was previously painted, it is recommended to remove the paint layer completely. To do this, you can use a scraper or grinder with a grinding nozzle. Backlogs of old plaster also need to be removed.

All metal elements must be removed from the surface to be treated, since the gypsum layer increases the effect of corrosion on them. Metal parts that cannot be removed are abundantly coated with an anti-corrosion compound.
Large cracks, chips and other significant defects must be covered with a cement mortar.
The minimum layer for some plaster mixes is 5 mm. But the optimum thickness for the plaster layer is within 1-2 cm. In cases where there are large defects on the surface, it may be necessary to increase the coating thickness to 8 cm. Under these circumstances, you will need to reinforce the surface with a galvanized or plastic mesh. Also, wall reinforcement is necessarily done in new buildings to exclude deformation during shrinkage of the building.
To install a reinforcing mesh on the entire surface of the wall, you need to mark with a marker every 35-45 cm. At these marks, holes are drilled using a puncher and plastic rods from dowels are inserted into them. The grid is cut into small rectangular pieces and fixed with an overlap on the screws. The distance from the wall to the reinforcing material should not be more than half a layer of plaster
Deflection is not allowed on the reinforcing cage, and when you touch it, vibration should not occur. To correct such shortcomings, a wire in the shape of the letter Z is threaded between the mesh cells to strengthen the structure. A more fluid stucco mixture is thrown onto the inner side of the mesh. This layer is left for 10-20 minutes to dry and only after that a thicker outer layer is applied.

You may also need to install guide beacons. As them, you can use the aluminum profile for drywall, which after drying the plaster layer must be removed. You can make lighthouses from gypsum mixture yourself. For this, a vertical strip is constructed from the solution and level it with the help of a level. You can work on gypsum beacons in 3-4 hours.
After the plaster has completely dried, it is necessary to check the uniformity of color and evenness of the surface. You can check the color only in the right bright light. Cracks and chips are not allowed on the finished coating, and it should not be perfectly smooth or very porous. Only fine pores are required on the surface. If there are defects, then on top of the finished coating you need to apply a second thin layer of plaster
To work with gypsum materials, you need to consider many nuances. For example, cement can be added to gypsum, mixed with alabaster or sawdust. Various additives give the solution new properties and textures. With any gypsum solution you need to work very quickly. If it hardens, then it will not be possible to soak the hardened mixture for further work with it.