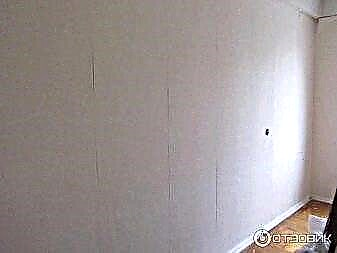
Such a defect can occur immediately after the repair is completed or after several years - this indicates a violation of the technology of working with the material, about the incorrect operating conditions of the coating. If the problem is not accompanied by an abundance of folds and bubbles under the wallpaper, you can fix it yourself, armed with glue and simple tools.
Humidity
To prevent the canvases from peeling off at the seams, after gluing, it is necessary to provide them with optimal conditions under which drying will proceed evenly, the process will take at least a day. Doors and windows must be closed so that drafts do not occur.
If in the future a microclimate with high humidity is established in the room, the canvases begin to peel off. The problem is caused by:
- insufficient ventilation of the room,
- flooding from above,
- the presence of water nearby
- malfunctions of the heating system,
- fumes from the basement.
The use of double-glazed windows provokes abundant condensation of moisture, in such an environment fungi and mold quickly multiply. Pathogenic microflora penetrates the joints of the wallpaper, causes them to stratify at the seams and the formation of dark spots.
Inappropriate glue
 The tool should be bought for a specific material, options for paper, vinyl and non-woven wallpaper have differences. When preparing the solution, you should strictly adhere to the manufacturer's instructions, since non-compliance with the proportions accelerates the process of seam divergence.
Auxiliary tools are selected depending on the type of wallpaper and glue - the quality and integrity of the finish coating also depend on them.
Poorly prepared base
At this stage, the masters inspect the walls to reveal areas with cracks, showered plaster, relief changes, and other defects. Restoring and leveling the foundation is considered an obligatory measure, otherwise, due to the bulges and voids, the canvas will lie unevenly, wrinkles and bubbles will appear, and the seams will quickly disperse.
If the surface is covered with dirt or dust, peeling cannot be avoided, care should be taken to ensure good cleaning and priming of the base. The remains of the old decoration on the walls lead to the same consequences.
How to glue wallpaper in the joints, if they are separated
It is not advisable to throw out the glue powder remaining after the repair, it will serve as insurance in case of defects on the finish coating. It must be diluted with water in the proportions specified by the manufacturer.
The joints of the paintings need to be slightly expanded so that it is more convenient to distribute the adhesive composition. To ensure uniformity, a narrow brush is useful. The sheets treated with glue should be pressed tightly, smoothing the joint with a clean cloth. If there are air bubbles under the wallpaper, you can use a plastic spatula when smoothing.
For restoration of joints, it is better to use the glue with which the wallpaper was originally glued. If it is not left or the expiration date is over, you can take other adhesive compositions, for example PVA.
PVA glue is suitable for working with paper webs, although it should be remembered that it can cause other problems. The “behavior” of polyvinyl acetate products varies depending on the manufacturer, sometimes brown or yellow spots appear on the wallpaper. Masters advise to dilute PVA with water in the proportions 1: 1 or combine it with wallpaper glue in a ratio of 1:10.
This option is not suitable for vinyl and non-woven materials, for them it is advisable to choose adhesive for joints. The main advantage here is the versatility of the composition - it is suitable for all types of paintings and creates a reliable connection. Special glue for joints is distinguished by ease of application: it is packaged in tubes with a narrow tip. The product is already ready for use, it does not need to be bred. When gluing wallpapers, manufacturers recommend maintaining the room temperature at +10 - + 25 °.
In order to prevent stratification of joints in the future even at the repair stage, a paper tape can be glued between the canvases. This is a special narrow product that enhances the fixation of wallpaper. The solution is not suitable for thin coatings of non-woven and paper, but goes well with heavy vinyl linens.
 The search for working glue is only the first stage of repairing joints, the gluing process deserves more strength and responsibility. Operation Manual:
- Cloths in the joint should be carefully unscrewed.
- Use a vacuum cleaner with a narrow nozzle to remove dust and debris. If an old whitewash layer or lagging putty is visible, they must be removed.
- If the putty layer is destroyed, the weld zone needs to be worked out again with putty and covered with a primer, and then wait for drying. Glue is evenly applied to the joint, and the edges of the wallpaper are pressed and rolled with a rubber roller.
- The entire surface should be smoothed out with a plastic spatula, simultaneously wiping the exposed glue with a clean rag.
Often during bonding voids form - air bubbles, they should be carefully pierced with a needle. Glue for joints or mortar for wallpaper is injected into such areas with a syringe, and excess should be removed with a rag. If simple PVA is used for gluing, the masters advise immediately to process the joints with an iron or a hairdryer: high temperature promotes the formation of a strong connection.
If the expiration date of the wallpaper glue has expired, it will not be able to provide the expected effect.
Do not regret the mixture: it is necessary to grease the wall and wallpaper profusely. In some cases, so that they are well saturated, you will have to wait 10-15 minutes according to the recommendations of the material manufacturer.
Is it possible to mask the joint
The issue is relevant in situations when a thin strip of wall is visible in a restored seam, which is especially noticeable on dark wallpaper. So that the light stripe does not stand out, it can be painted over to the color of the finish. In such a situation, a water-based paint is suitable, if the pigment is too saturated, then a little product is diluted with water.
The tip of a knife or spatula is dipped into the paint and carefully carried out precisely at the joint. At first it may seem that the seam has become more noticeable, but it needs to be grouted with a damp cloth, as a result, a strip that does not differ in shade will be obtained.
Textile
To restore the integrity of the seam of fabric wallpaper, you should minimize the likelihood of exposure to moisture - because of it, they change shape. The problem area should be cleaned of dust. Then apply glue. During its drying, the masters recommend that you refrain from airing the room.
When smoothing joints of any type of wallpaper, a rubber roller will be useful, with its help it is easier to even out the restored area. At the end of the work, gently wipe the seam with a rag to remove the exposed adhesive.
Why do wallpapers peel off?
There are a number of reasons why a new repair takes an unaesthetic look. The reasons for this are the most varied, but most often it is the failure to observe simple rules:
- Improperly prepared surface. Before starting work, you should check the wall for cracks and shedding of plaster.
- Wrong glue choice.
- Non-compliance with the proportions of the dilution of glue.
- Neglecting the rules of pasting. It is worth carefully studying the instructions before starting work.
- Drafts are one of the main reasons for peeling wallpaper. All doors and windows must be closed.
- Non-compliance with the thermal regime. Drying out or dampening is unacceptable.
- Incorrect or insufficient application of glue to the surface. Before use, read the instructions.
- Poor tool and material.
Consider these nuances, and the wallpaper will not lag behind and will last a long time.

Fungus
Life does not stand still. Simple windows were replaced by double-glazed windows, which in the houses of the old type contribute to the formation of condensate, and this threatens the appearance of fungus on the walls. Also, wallpaper often diverges because of this. In each room there are fungi, and they manifest themselves as soon as favorable conditions for this appear. It is easy to recognize the fungus: black spots form on the ceiling, around windows and at the joints of the house, which grow rapidly.


One of the main reasons for the appearance of such defects is dampness, which can come from the basement. It is necessary to check the basement and the foundation of the house for infection with the fungus. It can also occur due to leaking pipes, so before starting repairs, inspect everything in the bathroom. Do not allow poor ventilation, which often leads to the formation of condensate from the room air. The walls that freeze in the winter also provoke the formation of fungus.
There are several ways to avoid and cure the fungus:
- Frequent airing.
- For repairs, vapor permeable coatings can be used.
- The study of the walls with special chemicals.


What glue to use?
Having bought the adhesive, be sure to follow the instructions on the packaging. There are powder and liquid glue. Both require dilution proportions. It should take into account the climate of the room. If it is wet, use a moisture-resistant composition.
Do not use clerical PVAsince it does not guarantee adhesion to the surface and may leave brown spots after drying. There is also wallpaper PVA. It is only suitable for paper based products. Today, many different companies produce glue. You decide which brand to choose. The main thing to remember is that they are all very similar in composition.


How to glue in the joints?
If the wallpaper broke apart and peeled off at the joints, you need to perform simple manipulations:
- Bend the joint.
- Remove the remains of whitewash, garbage.
- Check the wall for chips.
- Coat joints with glue.
- Press the wallpaper into place and work out with a rubber roller.
- Smooth out with a spatula.
- Remove glue residue with a rag.

This method will return the wallpaper to its original form. It is necessary to use the glue that was originally worked. If a piece is torn from the canvas that has left at the joints, it can be restored. The main thing is to collect all the parts, arrange them correctly, and then put them on glue. The excess should be removed with a towel, smoothed with a spatula and allowed to dry. In this way, you can correct the situation after the "invasion" of the cat.


How to combine a pattern?
Having chosen wallpaper with a picture for your apartment, you should familiarize yourself with the rapport. This is the repetition rate of the pattern or its step. It is he who will help to correctly combine the pattern. You can find it on the roll label. Knowing the rapport, we proceed to the cutting of the product. First of all, you need to open two or three tubes of wallpaper, placing them on the floor, attach the joint to the joint and look at the picture.
Can cut the roll. Masters are advised to number the bands. Do not forget about a few centimeters of stock. Before starting work, remove all sockets and switches, insulate the wires. This will help to avoid wiring problems. Nothing will interfere, and the process will take less time. Upon completion of work in those places where the holes were sealed, a neat cut is made in the form of a cross and the excess is cut off.
When pasting striped wallpaper, alternation should be observed. Such a coating will help to visually lengthen the room. You can decorate the apartment by combining solid colors and canvases with a pattern. Pasting should start from the corner. It is worth gluing wallpaper with an overlap - plain on colored. It is necessary to leave the stock not glued, then cut off the excess and glue the wallpaper overlapping each other.

How to remove creases after drying?
For ceiling coatings, the following method is suitable:
- It is necessary to make an incision with a sharp clerical knife along the fold.
- Lap the upper part to the lower and smooth with a spatula.
- After drying, it is necessary to go over the coating with sandpaper and smooth again.
- In addition to wrinkles, bubbles may appear. A syringe, glue, towel will help to close them.
- Carefully pierce the bubble with the needle and insert the glue inward.
- After smooth, remove excess glue with a rag.


Tips for all kinds
The pasting process is most often the same and is suitable for all types:
- The walls should be intact, and the surface should be even and without cracks.
- Too smooth a surface is not very good. She should be roughened so that the wallpaper does not slip.
- Close all windows and doors, as there should be no draft.
- Observe thermal conditions. Make sure that the wallpaper does not dry out or damp.
- Do not forget about the property of some products to stretch, and then contract.
- Responsible to the choice of glue.
- Do not spare the glue. Coat well the joints and the perimeter of the wallpaper.
- It is best to start pasting from the window.
- Do not forget about the margin on each side 2-3 cm.
- Some wallpaper is better to glue in the overlap, while others - butt.
- After sticking the strip, do not forget to immediately smooth it with a towel, brush or spatula to expel all the air.
- Carefully read the instructions for wallpaper and glue.

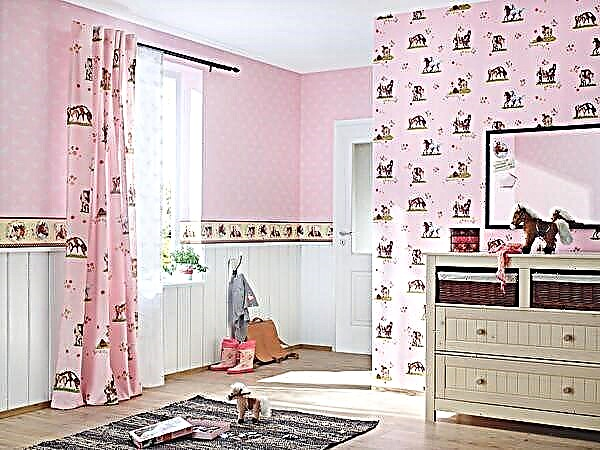
Paper
There is a clear instruction for pasting the room with paper wallpaper. First you need to determine what type you choose. It is not recommended to use simple PVA glue when pasting paper wallpapers. It may leave brown spots after drying. Exist:
- The usual smooth wallpaper.
- Duplex, which have two layers.
- Embossed wallpaper with a relief or pattern on the front side.
- Structural are made using different seals.
- Acrylic (foaming) consists of two layers and foamed acrylic on the front side.
- Moisture resistant - this coating can be washed.
There are two methods of wallpapering - butt and lap:
- Butt joint is the usual method of pasting and is suitable for all types and types of canvas.
- Only lap wallpapers without drawings and relief are glued. Relief coatings can hide bumps on the wall.

Non-woven
In the manufacture of non-woven coatings, cellulose fiber (non-woven wallpaper) is used. Such a coating is harmless to humans. It can be used in the repair of children's rooms and bedrooms. This wallpaper can be painted. When choosing a canvas with a pattern, it is important not to forget that when painting over time, the ornament may disappear.
Non-woven wallpaper breathes and does not absorb odors, which makes it possible to glue them in any room. For materials of this type, it is worth choosing a special glue:
- For pasting with single-layer options, the wall should be perfectly prepared, otherwise, due to the thinness of the coating, after drying, all the bumps will be visible.
- Multilayer wallpapers are used for pasting rooms with defective walls. Thanks to this coating, all the flaws become invisible.


Paste the room only end-to-end. To do this, they draw a foundation, but not the canvas itself, since it is very sensitive to pollution. The first segment is glued in parallel to the drawn line. It is smoothed out with hands, and then it is carried out with a roller along the entire length, expelling air. The next segment is glued butt to first. If a small gap appeared at the time of gluing, then you just need to gently pull it close to the first and work out the roller along the entire length.
Particular attention should be paid to the technology of gluing corners. It can be made only with an overlap. The technique of combining the pattern and pasting is similar to that of paper options. Non-woven wallpaper can be glued horizontally. To do this, make markings parallel to the floor, and then the algorithm, as with vertical pasting.
Paper-based non-woven wallpaper should not be glued in rooms with high humidity. The cloth washes to move away from the surface. Wrinkles the coating if there is air between it and the wall or pasting occurred in the cold. Although, as professionals say, subject to the rules for applying, no defects or problems will arise.

Vinyl
Vinyl wallpapers are most often used in repairs. They are easy to handle and, thanks to their interesting designs, help create different interiors. The wall under the vinyl cover should be perfectly flat. To begin with, it is cleaned of the old coating. It is necessary to putty base, and then primed.
It is necessary to allow the wall to dry and only after that proceed with pasting. Any error through such a coating will be visible. It is impossible to start repairs using vinyl wallpaper at a temperature less than 13 degrees. When this figure rises above, you should wait a few days, otherwise all the work will have to be redone.
When choosing a color scheme, you need to remember the lighting in the room. Light vinyl coating is advised to paste in dark rooms where there is not enough light. And the dark, on the contrary, is too light (to absorb excessive light).
You can paint the surface of the canvas up to 15 times, and some manufacturers offer products whose color can be changed up to 25 times. This property gives a clear advantage to this type of wallpaper over others. The main thing is not to forget that when pasting vinyl coverings are stretched, and when dried, they are pulled together. In no case can they be pulled. In addition, you need to glue the wallpaper butt-to-butt (without stretching). Otherwise, huge gaps may appear.
Such wall coverings have excellent performance. They are resistant to various detergents and water. Vinyl wallpapers can be glued in all rooms (even with high humidity). When smoothing such a cloth, do not use a spatula, otherwise scratches may remain. It is better to take a rubber roller, with which a piece of wallpaper is smoothed out. You also need to kick out all the air to avoid wrinkles.
If you follow all the rules that are written on the roll itself and on the packaging with glue, then such wallpapers will become an adornment of any interior.
How to update?
If the washable wallpaper turned yellow, then you should wash it. You can use different detergents. To remove greasy stains, it is permissible to attach a white napkin and iron. Before washing the surface with any product, it is worth trying it on a small piece of wallpaper.
You can also mask defects with a continuation of the picture or stick a new section of wallpaper that is suitable for the theme. Another way: remove the desired piece from an inconspicuous place, and stick a similar one in its place (in tone). If you have an artist at home, then he can help you mask the scuff marks by adding a few elements. Anyone can use this method.

You can use pictures as decoration. They will help to mask dents. One way to save a faded coating is to repaint it with water-based paint (if it allows it). You can also glue in place of the damaged fragment of the mural or any other color-appropriate canvas. You may be able to find the same wallpaper as yours. Restoration is worth starting only if you are sure that gluing wall coverings will not come cheaper.
You will learn more about how to fix a junction problem from the next video.
Why do coatings leave the wall?
 It happens that everything was done according to the instructions, but the wallpaper moved away from the base. The main reasons for peeling off:
- Surface defects. The phenomenon is not uncommon, since the walls are deformed or initially uneven. Prior to the commencement of the finishing work, poorly adhering plaster should be removed, and all visible cracks should be puttied.
- Installation of walls made of drywall sheets was carried out incorrectly. The joints between the sheets were poorly processed.
- Gluing surfaces are poorly prepared. Probably they left the old wallpaper or traces of painting or whitewashing (learn how to remove liquid, photo wallpaper, washable wallpaper). The situation will become more complicated if they are not primed in advance (why should the walls be primed under the wallpaper and how to do it?). This is an invariable step of gluing materials.
- Wallpaper was applied to a damp surface, a dry primer or plaster.
- Wallpaper glue is applied unevenly. This is a common mistake. Troubles are possible if the paste is applied with a brush and not with a roller. Gaps appear on the canvas, areas without adhesive (how and what to apply glue to the wallpaper?).
To do this, it is recommended to do the following:
- The first days of keeping doors and windows closed.
- To prevent drafts, block ventilation.
- Blind the windows so that the rays of the sun do not fall on the wallpaper.
Often the stripes leave, bubbles appear, if the room is cool, high humidity.
What to do if rolls lag behind?
If a similar problem has arisen, you need to know how to solve it correctly and stick the peeled off sheets:
- Do not work with PVA glue. It practically does not dissolve in water, so it will be difficult to remove the coating from the walls before a new repair. After working with this glue, yellow spots may appear on them (you can find out why the wallpaper turned yellow after sticking and how to remove the problem here).
- It is advisable to use wallpaper glue. But it must be liquid.
- If the canvas does not stay in place of joints or in corners, it is recommended to take special glue. It is sold in any building materials store. High-quality composition will not leave stains, provide a strong grip.
For work, you will also need:
- brush
- roller
- narrow spatula
- syringe,
- hair dryer
- dry clean rags.
 If the coatings leave at the joints, you need to gently bend the edges, remove adhered debris with a spatula. Then apply the adhesive solution, press the edges with a roller. Remove excess glue with a rag.
If the canvases are removed from the ceiling or wall, wallpaper glue is required. It is necessary to dilute it with water thinner than usual and coat the material. Then wait five minutes and stick the strip to the wall. It is recommended to keep the windows closed for two days.
How to glue seams at joints and corners that are broken?
 The main problem, why wallpapers are peeling off, is that working with them seems simple. It begins, not knowing the intricacies and rules.
The recommendations are as follows:
- Do not save on finishing materials and try not to buy discounted goods.
- Before starting work, read the instructions.
- Use special spatulas and rollers.
- Have clean cloths in stock.
- Buy a good wallpaper glue and special for joints.
- Carry out quality foundation preparation.
- Carry on the stick before the start of the heating season. It is desirable that the glued walls dry out in natural conditions.
- After repair, you can not ventilate the room to avoid drafts.
Practical advice: how and how to glue the departed canvases?
If the repair is completed, but the wallpaper has peeled off, the owners are thinking how to glue them again. To keep the canvases, you need to use the following methods:
- If the edges are gone, you need to re-glue the joints. There should be no debris or dirt at the edges. Carry over using high-quality wallpaper glue. But it needs to be made more fluid than usual.
- When the panels moved away from the base, bubbles swelled on them, you can fix the defect without removing them using a medical syringe. First, pierce the desired area with a needle to release air, and then slowly insert a paste under the canvas with a syringe. After a few minutes, the wallpaper will be saturated with glue, and they can be pressed against the wall (how to remove bubbles on the wallpaper?).
- If the canvas is not only peeled off, but also moved away with the plaster, there is a possibility of tears. The defective area must be replaced with new material and plastered again. To do this, it’s good to have a roll with the same pattern in stock. This option is suitable if a little time has passed after the repair.
Professionals recommend using only good materials and paste, and also do not save and buy glue for joints. Its main advantage, thanks to its special composition, is its instant grip on surfaces.
Obviously, the reason that the wallpaper is gradually peeling off from the base is poor compliance with the instructions when preparing the surface or during gluing. But the situation is not difficult to fix.
Repair can be done by yourself. (How to repair the wallpaper and joints, if they are separated?) With the right work, the wallpaper will hang on the walls for a long time and delight the owner with a neat look.
Reasons for peeling wallpaper
Sometimes this phenomenon seems inexplicable. It seems that both the wallpaper was purchased of high quality, and the brand glue, but after gluing the problems begin. In this situation, as a rule, they begin to sin on the quality of the wallpaper, but I will try to dissuade you of this.
What could lead to this problem? The following factors:
- bumps on the walls,
- undeleted remains of the old coating,
- contaminated and dusty base
- dirty putty that behaves like dust
- dry plaster
- draft,
- poorly applied adhesive composition
- non-compliance with the instructions for the use of adhesives.
Now, knowing the reasons, the next time you can, pasting the wallpaper, avoid mistakes, but, now, let's fix the existing ones.
Why wallpaper is peeling off
There are many reasons forcing a renovated room to lose its original beauty. There are two main reasons: either environmental factors, or lack of adherence to gluing technology. Environmental factors include:
- High humidity. It is caused by problems with the heating system, ventilation of the room, proximity to a large body of water, unexpected flooding. Repeated repairs are more likely to occur among private sector residents. Houses located next to rivers flowing every spring are flooded, which is accompanied by peeling of wallpaper and irreversible damage to other finishing materials. Such a problem lies in wait for the owners of apartments, which are located on the first floors of buildings. Vapors coming from damp basements penetrate into the living space, becoming a source of wet scatter.
- The appearance of fungus and mold. Today, the practice of installing double-glazed windows in obsolete buildings has spread. After the work, the vapors condense, generating a favorable environment for the propagation of microscopic fungi. The attack can be found on the ceiling, around window structures and inside the joints of gradually increasing dark spots. The main reasons for their appearance are represented by basement dampness, leaking pipes, poor ventilation and winter freezing of the walls. The propagation of fungi is prevented by frequent ventilation of the room, the laying of vapor-permeable materials and the treatment of walls with chemical antiseptics.
As for the human factor, there are many more reasons:
- Incorrect surface alignment. The base should be examined for the presence of cracked areas, crumbling layers of stucco, suboptimal relief height and other defects.
- Incorrectly selected adhesive solution. His brand must firmly hold a specific variety (paper, vinyl, non-woven) of attached wallpaper. In addition, glue should also be diluted according to the instructions, as the wrong proportion leads to the peeling of the paintings.
- Non-compliance with the temperature regime (for example, the master ventilated the repaired room during work). The draft path is blocked by tightly closing the window sashes and locking the door leafs.
- The exception is the stage of priming the surface. Dust and dirt remaining on the surface, as well as a poorly prepared base, are a guarantee of the lag of wallpaper paintings. Checking the surface quality is easy: take a piece of electrical tape, stick it on the wall and tear it off right away. If large particles of finish are present on the sticky part, continue to prepare the surface until it becomes completely smooth.
- Using incompatible tools and poor materials. Today there is a huge source of information where you can find information that helps to choose the right wallpaper, leveling mixes and suitable devices. His name is the Internet. And in any hardware store they will tell you exactly what glue is suitable for certain wallpapers, and which tools are better to use.
Whatever the cause of this trouble, it will still have to be eliminated (unless, of course, you want to make repairs every six months to a year). So, if the joints on the wallpaper come off, then they will have to be glued again, using the allowed means.
How to glue backward at the joints of the canvas
Often, after repair, a little sticky glue remains in the powder. In this case, we simply dilute it with water and, diluting the joints of the wallpaper, apply the adhesive. You can use a brush to distribute the glue evenly. Then tightly press the wallpaper to the wall and to each other and wipe with a clean rag. To remove air bubbles, you can use a special plastic spatula.
Of course, better than the wallpaper glue that these wallpapers were glued to, no. But if there is no material left or a lot of time has passed after the repair, and the expiration date of the fixing composition has already expired, you will have to use other methods.
One of the budget options is the use of PVA glue.
For non-woven and vinyl wallpapers, polyvinyl acetate glue is definitely not suitable, so you will have to visit a hardware store and purchase a special glue for joints. The advantage of such a fixing composition is that it is exactly suitable for any type of webs, while ensuring reliable fixation.
Another advantage is its easy application: such glue is produced in tubes with a thin tip in a ready-made form (that is, it does not need to be diluted with water or any other means). The ambient temperature when using the product can vary from 10 to 25 ° C. The most popular brands on the market today are Kleo, Quelyd, Metylan.
Glue it right
The choice of fixing composition is only half of the joint repair work. The most crucial part ahead is the gluing process. We do everything in stages:
- We carefully turn off the diverged canvases.
- With a vacuum cleaner we remove all debris and dust, if necessary, eliminate the obsolete layer of whitewash material, pieces of lagging putty.
- If the putty layer has fallen off along with the wallpaper, putty again.
- Before gluing, apply a primer layer to the wall.
- After drying the primer, apply the selected fixing composition. The edges of the wallpaper strip are gently pressed into place and rolled with a rubber roller towards the joints.
- At the last stage, the plane is smoothed with a spatula and remove excess glue with an ordinary clean rag.
If after sticking the material formed voids filled with air masses, in the place of their presence the wallpaper is pierced with a needle. An additional amount of solution is injected into the cavities through a syringe, and its excess volume is removed with a rag.
If PVA was chosen for fixation, then the joints need to be heated either with a hairdryer or with an iron - this ensures a more durable connection.
How to make sure that the joints of the wallpaper do not peel off

In order to avoid such situations after repair, the quality of the work performed must be taken care of in advance. Often the masters, and the owners themselves, who make repairs themselves, forget to read the instructions on the box with wallpaper glue or other materials, do not take into account the type of wallpaper, thinking that they performed this procedure “1000 times”, which means they cannot be mistaken. However, each finishing and building material has its own characteristics for use. And so as not to have to fix your own jambs later, always read the instructions on the packaging.
Also, to keep the wallpaper tighter and not peel off, follow some rules:
- Always thoroughly prepare the base: level, putty, primer.
- Choose a specially designed fixing composition for your type of wallpaper (there are varieties of glue for paper, vinyl or non-woven).
- When buying, pay attention to the expiration date of the glue - expired goods can spoil both the wallpaper and your mood.
- Do not spare the glue, always grease both the canvas and the wall. If the wallpaper needs time to “soak”, always observe the interval.
- For application, use a roller, not a brush - so you will cover a large surface in a shorter time.
- To smooth the joints, use a special rubber roller, for the entire canvas - a plastic spatula. Remove exposed glue with a clean cloth.
Remember: only careful preparation of the base and adherence to technology when pasting can prevent such a nuisance as peeling off the joints of wallpaper.